LED screen production tutorial
First, the blanking:
1, according to the size of the screen, remove the number of horizontal plate, placed neatly, there can not be bent or dislocation. By volume
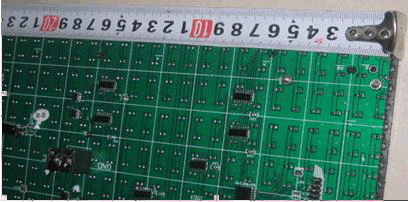
Mark the edge of the board (see Figure 1) and measure the length of the screen.
First, the blanking:
1, according to the size of the screen, remove the number of horizontal plate, placed neatly, there can not be bent or dislocation. By volume
Mark the edge of the board (see Figure 1) and measure the length of the screen.
The 1 unit plate neatly, hook plate side tape unit
2, the actual size of the amount minus 1-2 mm as the size of the cut (Figure 2).
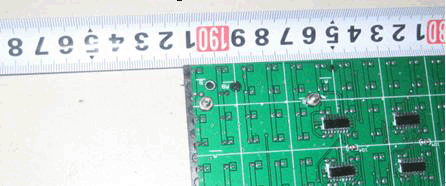
Figure 2 actual length of 191.3 cm, the size of the material is about 191.2 cm
3, the vertical placement of the unit, the measurement of the size of the unit board width (Figure 3).Pay attention to the arrow direction on the cell board.
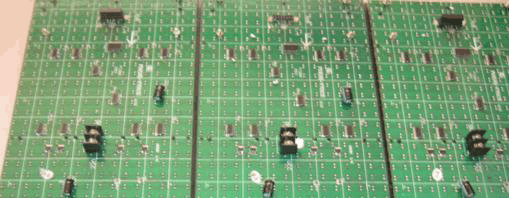
Figure 3
Two, assembly:
4, "after the first electric drill drilling, and then use self tapping screws or rivets assembled frame. Pay attention to the fixing hole
Hit the corner of the plastic corner with the profile (see Figure 4).
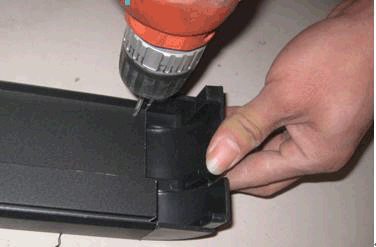
Figure 4
5, the frame assembled, the unit plate horizontal and vertical arrows respectively according to the same direction neatly (note the arrow must be exactly). The fixed pillars or magnet is screwed to the screw on the plate on both sides of the unit (Figure 5).

Figure 5
6, the unit plate horizontal cable used to connect cable that don't flip, can not be inserted in the wrong (Figure 6). The side ends of the side board vacated without installing cable.
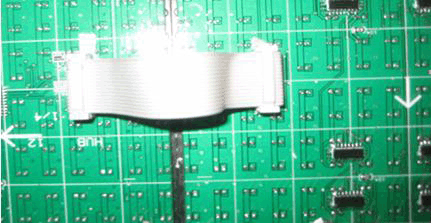
Figure 6
7, connect the power cord. Red positive black negative, the unit board VCC is positive, GND negative. We must carefully check and cannot be reversed, otherwise it will burn out the unit board or other components. Generally three to four pieces of board for a set of parallel connected together, lead to positive and negative of the two joints, to the corresponding output of the switching power supply (see Figure 7), the specific method is described in detail.
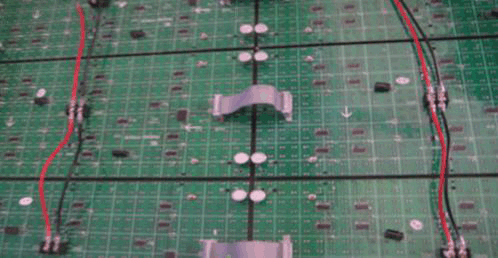
Figure 7
8, fixed flat iron. After the unit plate is screwed on the magnet, the flat iron which is used is cut according to the corresponding width of the frame body. The flat iron with self tapping screws or rivets fixed to the frame (Figure 8, figure 9). Pay attention to the magnet on the edge of the unit plate, which is used for the two unit plate with a flat iron (Figure 10). General should be the first side of the flat iron drill is fixed, then the other side of the eye, to drill the frame body to squeeze together, do so out of the box body is not out of shape.
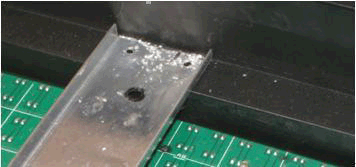
Figure 8 drilling
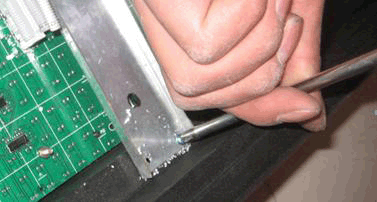
Fig. 9 fixed flat iron
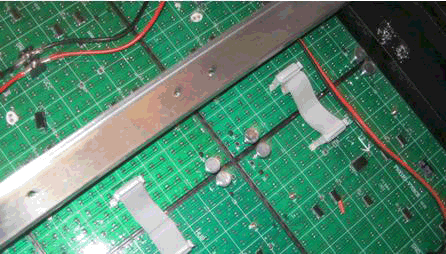
Figure 10
9, after all the flat iron fixed, with a vacuum cleaner on the back of the screen aluminum scraps, dust and so on clean (Figure 11). Scrap aluminum residue may cause a short circuit or other components in burn unit.
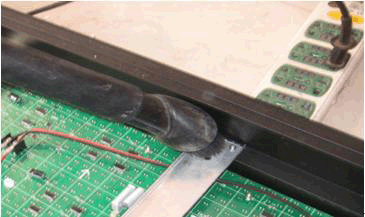
Figure 11
10, the power supply. Figure 12, semi outdoor unit in general nine block with a 5V40A power supply. There are three sets of output ports on the power supply, the power supply, as shown in the drawing of the three sets of lines. The wiring method is to reduce the load on each line, the actual production should refer to the connection method.
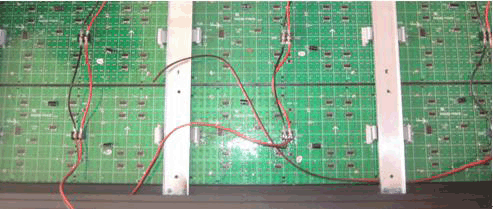
Figure 12
11, the power will be fixed to the frame. Ensure that all joints are connected to the power supply (see Figure 13).
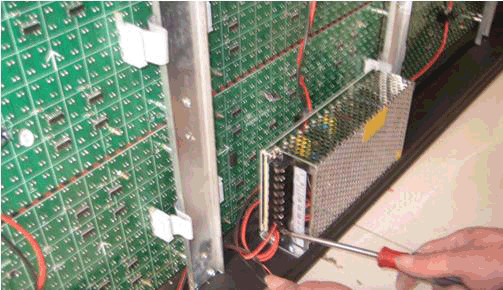
Figure 13
12, switching power supply, the L/N is the terminal of the exchange of the 220 input terminals; is the screen body grounding, where the line is directly connected to the screen body; COM is 5V negative; +V is the 5V cathode. Connect each line on the cell board (see Figure 14).
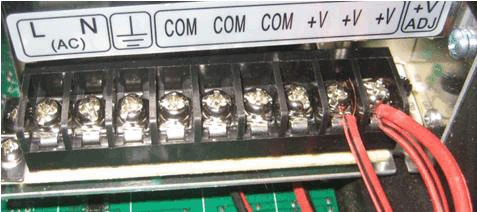
Figure 14
13, connection control card. LED display data from the front of the screen, are sent from right to left. The control card is fixed on the right side of the screen. Good eye in the right side of the flat iron, twisting the pillars, with the appropriate size of the screw will fix the control card. Note that the control card is not directly contact with the metal, can be placed in the middle of the board, plastic board and other insulation (Figure 15). The data output on the control card must not be connected to the unit board.
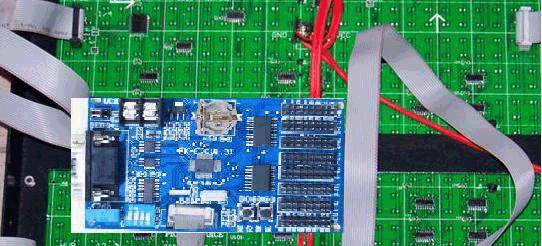
Figure 15
14, the power on the control card to switch from the power supply directly lead, can not be connected to the control card through the unit board. Positive and negative poles cannot be connected (Figure 16).
15, all the switching power supply 220 input in parallel together, and leads to a plug as the power supply of the screen.
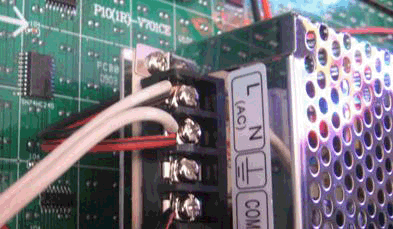
Figure 16
16, check the power cord is not connected or loose, to determine no problem. Plug in the power plug. If all the power indicator light is on, it will be ok. If there is a power indicator light does not light or found a smoke, fire phenomenon immediately cut off the power cord. Check power and wiring.
17, the power supply is normal, the control card on the data output line to the right side of the display screen of a column of the data input. Pay attention to the direction of the data line. If the normal display, the display is no problem.
18, display normal, on the site to download the latest operating software. Set the screen parameters through the software, enter the need to display the content, and finally export the program to the SD memory. Put the SD memory in the picture above
 Download APP
 Public concern

